Wednesday 16 July 2014

Kombucha and the art of bread making

Here's a thing...

At the shop, (Beanies) we were recently sent some samples of Kombucha - a lightly effervescent drink made from fermented sweetened tea.  It came in different flavours so I picked a ginger one and unscrewed the cap only to have the contents of the bottle explode all over me and the desk.  (Keep it chilled is the advice - this one was at a warm room temperature!)  After I'd cleaned up and enjoyed the beery flavour of the ginger tea I got to reading the bottle and thinking a bit about it.

Kombucha is made from a live ferment known as a SCOBY (Symbiotic Colony of Bacteria and Yeasts) and this one seemed particularly lively.  I just wondered whether it would be possible to use the kombucha to start a sourdough culture.  I know this isn't always possible - some fermented products simply don't have the right mix  or varieties of yeasts and bacteria.  But nothing ventured, nothing gained as they say...

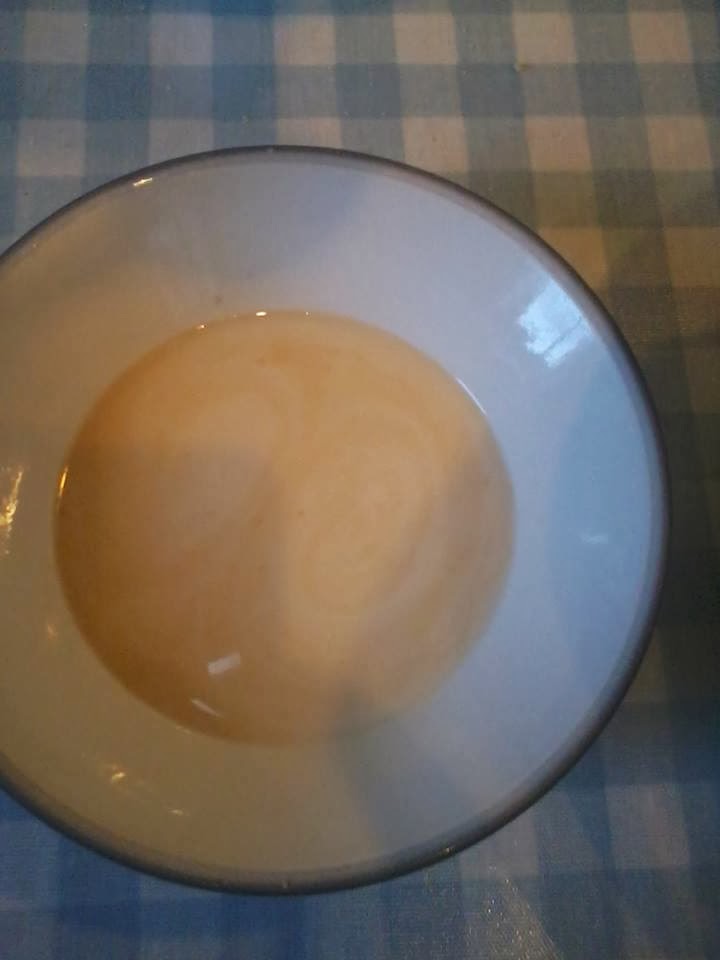
So I took a bottle of the original unflavoured kombucha home and used 150ml added to 150gms of strong white flour.  (The photographs are my second attempt where I've used strong wholemeal simply because I've run out of white - I tend to use organic white flour for sourdough starters as they prove more stable: wholemeal starters have a tendency to separate and go mouldy if a careful eye is not kept on them - keep them in the fridge.)

150g wholemeal flour
150g kombucha
So, basically...

150g kombucha
150g flour


Mix together in a plastic tub - cover lightly with a lid or cloth and put aside for 24 hours at room temperature.

By then end of the overnight fermentation the starter was sufficiently bubbly for me to feel confident to move straight to mixing a starter dough.


I added
100g white flour
and a little more water to create a slightly stiffer dough than the original mix.

This I again left overnight, covered and the following day was very happy with the fermentation.

So for the final loaf I added
400g wholemeal flour
1 tsp salt - (I don't use a lot of salt (you might prefer more) partly for health reasons and partly because sourdough bread has good flavour anyway.  Salt does have an effect on both the texture and shelf life of the finished bread though so I do use some.)
1 tbsp Extra Virgin Rapeseed Oil - but you could use Olive or sunflower
More water  - (I must admit I didn't weigh the water I used to create the final dough - fool! - but the final dough ball weighed about 1200g so I must have added about another 150 - 200g.  It was a reasonably firm dough.  Don't let it get too wet but obviously the old mantra stands - The Wetter the Better!

I mixed this final dough at around 8.00am.  Kneaded for 5 mins and then left it to stand, covered, until about 12.30pm by which time it was just starting to fall back ready to be degassed and shaped.  (If I'd been around during the proof I would have stretched it a couple of times, but I wasn't so I couldn't.)

Anyway dough weighed to 900g, (leaving 300g for a quick pizza for lunch) then shaped and tinned up for a final proof of about an hour.  Into the hot oven (Gas Mark 7 - my oven is quite fierce) for half an hour, turning the gas down to Mark 4 after twenty minutes...

Final result...

My conclusion is that - yes!  Kombucha can be used to raise bread very effectively!  As a shortcut to a sourdough starter I think it's great.  Of course once you've got your live kombucha you can keep it alive too... but I don't quite know how t do that yet... time for a little research, methinks.


I'd be fascinated to hear whether anyone else has similar experiences.


Sunday 1 June 2014

Rich Stem Ginger Cake


I've said before I'm not a great baker of cakes - so mine have to be technically undemanding. This one is!

The recipe calls for Stem ginger which can be purchased in most supermarkets and often comes in glass jars in a rich gingery syrup. The ginger is usually cut into round balls. With a sharp knife these can be diced into small cubes. This recipe is suitable for vegans and makes two 1lb loaf cakes.  You could of course substitute gluten-free flour and make it, er, gluten-free too:


Preparation time: 20 minutes
Cooking time: 30-35 minutes

Ingredients:

2 medium dessert apples
100ml sunflower oil
90 ml Water, warm
185g Dark Muscovado sugar
8 lumps of stem ginger
15g ground ginger

350g self raising flour

1/2 tsp baking powder (this usually has wheat flour in it, so if you're making the cakes for gluten free people find some gluten free baking powder too! ... there's one made by Barkat 
which we stock at Beanies.)


1 tsp salt

Method

Preheat the oven to 350F (180C)
Grease and line two 1lb loaf tins.
(Alternatively, you can use an 8" round tin greased and lined with baking parchment - the cooking time will need adjusting accordingly.)

1. Peel and core the apples then grate them into a large bowl.
2. Add the water, sugar and oil and stir thoroughly, making sure that all the sugar is dissolved.  Finely chop the stem ginger and stir it in.
3. In a separate bowl sift the flour, baking powder and salt together.
4. Combine the apple and ginger mixture with the dry ingredients, folding in the flour. Take care not to beat the mixture as this will cause the gluten in the flour to become tough.
5. Pour the mixture into the two loaf tins (or one large one) and gently level out the top with wet fingers or the back of a spoon.
6. Place in the preheated oven and bake until golden brown and risen and a cocktail stick comes out clean!
7. Cool for a few minutes in the tins and then remove them and place on a wire rack to cool.

This cake will keep well for a few days if well wrapped - that's why you make two! Enjoy one straight away and the other a few days later - or if you're feeling generous give the second away to a friend.  You can freeze it too.  Keep it wrapped in its parchment and then wrap it in aluminium foil and pop it into the freezer.  Unwrap it and defrost it thoroughly before eating!

Friday 4 April 2014

Simple Roast Vegetable Quiche


How to make a delicious quiche AND pass on a few skills to a daughter!


Courgettes Preheat oven to Gas Mark 6 (200C).......

Cut up some vegetables into coin size chunks. You can use whatever you have available but these are what we used and are a traditional mixture.
- 1 med Onion
- 1 med aubergine
- 1 Red pepper
- 1 courgette
- 6 - 8 medium to large mushrooms, quartered

add
- 2 cloves garlic, unpeeled and crushed

Place in roasting pan and drizzle with olive oil
Sprinkle with a teaspoon of salt flakes and 1 teaspoon dried mixed herbs.
Place in oven for 20 - 25 minutes
Remove from oven and peel garlic, crush or chop and return to veg mixture.

While veg is roasting make the pastry...


(1oz flour = 30g = ½ level tablespoon)
- 6oz (180g) flour
- 3oz (90g) butter
- pinch of salt

Rub butter into flour and salt until it resembles breadcrumbs
Add enough cold water to bring together into a dough - don't over-knead!

Rest pastry in fridge for 15 mins.
Roll out pastry and line quiche tin.
Turn the oven down a little to Gas Mark 5 (180C)
Bake the pastry blind for 15 minutes until it looks nicely dry.

(Tip: blind baking is best done by lining the pastry case with baking parchment and tipping baking beans into the middle - this prevents air bubbles in the pastry from lifting the bottom. Alternatively you can prick the bottom all over with a fork.)

Brush with beaten egg to seal any cracks in the pastry and return to the oven for 5 mins.

While blind baking the pastry case you can make the egg mixture:........

Beat 2 large eggs with ½ pint of milk and 3oz (90g) cream or cream cheese then season to taste adding salt, pepper, mustard, cheese...

Fill pastry case with veg
Pour on egg mixture
Top with grated cheese
Bake for 35 mins till golden brown.


Serve with some steamed broccoli or a green salad and some salad potatoes...
Delicious!

Monday 24 March 2014

Baking with Savvy

Savvy

We've recently taken delivery of some Savvy spreads at Beanies and as it's such an interesting product, using natural sweeteners, I wondered how it would perform in a bit of baking...

Original Savvy is a spread made from tahini, carob syrup and organic wildflower honey.  There is also a Savvy which is sweetened with Agave syrup and therefore suitable for vegans - and Chocolate Savvy one with honey and one with Agave.

It has a distinctive aroma and flavour and I must admit when I first opened the jar I was a little disconcerted - the aroma was more like a savoury spread than a sweet one but after a couple of finger dips I was convinced...

Jonny Drury, the developer and manufacturer, suggested that I might try making some parkin with it and he gave me the basis for a recipe...

I gave it a go:


  • 200g medium oatmeal - ( Jonny actually suggested plain flour or gluten free flour but I thought oatmeal might give a more traditional parkin texture)
  • 400g Savvy Chocolate spread
  • 3 large eggs
  • 30g desiccated coconut
  • 1 tsp Almond extract - optional


Method:

  1. Preheat oven to 150C
  2. Mix it all together!  (The Savvy is quite viscous so you have to work quite hard to beat the eggs into it.  It might be an idea to stand the jar in a bowl of warm water for a few minutes to get it moving.)
  3. Pour the mixture into a baking tray.  ( I was using one of the foil trays that we use at the bakery - it's about 9"x11".  In retrospect the tray may have been a bit too large as the parkin could do with being a bit thicker.  Try 8"x8" square.  I lined mine with parchment - it just makes it easier to get it out.)
  4. Bake for 25 minutes until a cocktail stick comes out clean.
Usually with parkin it's best to leave it a wrapped up for a week or so before cutting to develop a nice sticky texture - but I can't do that I need to taste it!

Verdict:
Having tasted the parkin I think actually it could be more flavourful if I had used ginger in it rather than almond essence - some stem ginger or ground spice...  and I do think it will be better for keeping a while as it's slightly on the dry side at the moment.


I also tried my hand at a chocolate Savvy flan...
  • 1 x 7" pastry case - blind baked.  (I actually didn't blind bake my flan shell but I should have!.. You want a soft wobble set on the finished flan which means a fairly short baking time at a not-too-fierce temperature - about 130C - which means the pastry doesn't get that crisp.  Blind baking should sort that out... next time...)
  • 200g Savvy Chocolate - again warm the jar a little to help with the mixing.
  • 2 large free range, organic eggs - beaten
Method 

It couldn't be simpler...
  1. In a bowl combine the eggs and the Savvy
  2. Pour into the pastry case
  3. Bake at 130C until the filling is just set.  The filling will rise a little as it bakes but it shouldn't go too far or else it will become a little rubbery
  4. Allow to cool...
  5. Enjoy...
Verdict:
This was a tasty tart - it certainly could have done with blind baking and I think the filling needed to be slightly looser.  Savvy as I mentioned above is quite viscous and I think if I made this again I would let it down a bit maybe with soya or rice milk.  This would help with the mixing in of the eggs and should provide a softer textured flan.

Overall I think Savvy will be an interesting addition to my baking cupboard but I'll have to practise a little more before I get really delicious results with it!  I've only tried baking with the Chocolate Savvy - at some point I'll have a go with the Original.


Monday 17 March 2014

Pound Cake


I'm not a terribly experienced cake baker and - everything seems so precarious in cake baking - one false move and you end up with a concave mess instead of a proudly domed confection.  Bread is much more forgiving.
.. but it's birthday time in our house and I can't allow her to bake her own birthday cake.  So she has allowed me to take over at the stove and has primed me with tips and recipes.
Her favourite cake is Pound Cake - a straightforward buttery delight - and her favourite recipe is Molly Katzen's in The Moosewood Cookbook.  Molly writes in a beautifully graphic way - easy to follow classic recipes with her own beautiful illustrations.

 I've adapted her recipe a little as it makes slightly more mixture than we need for our tin!  Also she is American so I'm having to do a little cup conversion work:

300g (10oz) caster sugar
300g (10oz) butter
300g (10oz) plain flour
4 eggs
150mls (2/3 cup) milk
2 tsps Vanilla extract
2 tsps baking powder
1/2 tsp salt


Method
Preheat the oven to about 350F or 180 C or Gas Mark 4

1.  Prepare your tin - butter the inside and sprinkle with flour to cover.  I'm using a bundt ring.  


2.  Put the butter and sugar together in a bowl and cream with an electric mixer until pale and fluffy


3.  Crack the eggs into the mixture one at a time - beating well after each addition.


4.  Sift the dry ingredients together and prepare the milk and vanilla extract in a separate bowl

5.  Add a little flour and fold in.  Then add a little of the milk.

Keep alternating between the two ending with a last addition of flour.

Don't work the batter too much at this stage - just fold in so that the flour and milk is combined - you are trying to maintain a light fluffy texture.

6.  Fill the prepared tin with the batter and smooth the surface with a spatula or the back of a spoon.

7.  Place in the preheated oven and bake until risen and golden brown - a cocktail stick or skewer should come out clean.

Allow to cool in the tin before turning out onto a cooling rack.

Some strange bubbling took place in mine
but it hasn't affected the taste
and that bit goes on the bottom anyway!...
...See...


The cake is best kept for a couple of days before cutting, wrapped in foil and placed in an air tight tub.
Then decorate appropriately...
Then eat inappropriately...

This is a plain cake with a fine close texture.  You could fancy it up, with essences or zests or some such fol-de-rol but really the beauty of it is in its simplicity - rich, buttery and moreish.


Sunday 2 March 2014

Pizza Rolls...

Here's a simple recipe for Pizza rolls...
I'm not sure if Pizza Rolls are a real thing, so maybe I've just invented this, but in my mind it's a good enough recipe to share and the end results are deliciously more-ish.  They are a great snack or starter - a tear and share bread good for informal parties, for watching The Voice, TOWIE or the football with friends - well you know what I mean!  I tend to make them with left over dough after a bread baking session, which makes them really quick and convenient, but I've given you a simple dough recipe below so you can make them from scratch.

The filling here is really simple but you could make it much more interesting with the addition of a few roast vegetables or something if you prefer.

So what are pizza rolls?
Can you imagine a chelsea bun type savoury cheese and tomato roll?  Of course you can - it was easy wasn't it!  Well done!... that's a pizza roll

For the dough:

  • 300g plain white flour (or pizza flour if you have it - you can use strong bread making flour but not it's necessary for this recipe.)
  • 225g water
  • 10g salt
  • 10g yeast fresh yeast (I prefer to use fresh yeast but you can use 1 tsp dried,  following the manufacturers recommended for activating it if necessary)
  • 1 tbsp olive oil
For the Filling:
  • tomato purée - I use the double concentrated stuff you get in a tube - it's highly flavoured and quick and convenient - but you could of course make your own tomato sauce, just make sure it's well reduced, it needs to be spreadable rather than pourable. 
  • 200g grated cheese - of course mozzarella is the traditional pizza cheese but I use a good mature cheddar - it's got a better flavour for the purposes of this recipe and, besides, I'm much more likely to have it in the fridge than mozzarella!  If you've got some mozzarella you might like to use a combination of the two...
  • a sprinkling of dried herbs...

Prepare the dough:

  1. Place flour and salt into a bowl.
  2. Melt the yeast in the water and add to the flour.  Mix together to a  fairly loose dough.
  3. Add the oil and work this in.
  4. Tip out the dough onto a lightly oiled worktop and knead for a couple of minutes.  It'll be quite a sticky dough to work with so won't require much in the way of kneading.  By the time it's finished proving it will be much more manageable.
  5. Oil the bowl and return the dough to it.  Cover the bowl and leave it to double in size - at least a couple of hours (or overnight in the fridge).  Stretch the dough a couple of times during this period  - just tip it out onto your worktop and stretch the dough out and fold it back on itself then return to the bowl.  this just helps the gluten strands to line up and gives a better structure to the dough.
Prepare the rolls

  1. Preheat your oven to 230C, 450F, or Gas Mark 9
  2. Tip the dough out onto a lightly floured worktop.  Cut a cross in the top of the dough and where the cross crosses gently ease out the corners opening the dough out.  This should provide the rough basis for a rectangular shape.  Using a rolling pin flatten the dough out and roll it out to form a long rectangle with the dough just a few millimetres thick.  If there is resistance in the dough just leave it for a few minutes to relax and then try again.
  3. When you have a nice long rectangle, probably about 18" long by a 12" wide, squirt a good squirt of tomato purée onto the dough, grab your palette knife and spread the tomato paste all over the dough.
  4. Sprinkle most of the grated cheese over the whole thing.  Be generous.  This recipe requires a lot of tangy savoury-ness.
  5. Sprinkle your dried herbs over the top - if you're feeling daring you could even go with a light chilli dusting for a bit of heat.  (This is where you could be a bit more adventurous with the filling - add some veg or some chopped, pitted olives, but for me the simplicity of the filling is part of the attraction!  The combination of the intense tomato purée and the sharp tang of the cheese is to my mind all you really need.)
  6. Now roll the whole dough up from the long edge to create a long sausage.
  7. Cut the dough sausage into small lengths about 2.5cm (1") long.
  8. I find the best receptacle for Pizza Rolls are the foil baking trays we use at bakery - either the smaller round ones or the rectangular.  At home I'd probably use a swiss roll tray or a shallow roasting tin. Basically, you want something with an edge to it.  whatever you use, line it with some baking parchment so that the ends of the parchment stick out over the sides of the tray.  These are useful for lifting the baked rolls out for serving.  Place the cut "slices" of dough end up in the lined tin so that they nestle quite snugly against each other.
  9. Sprinkle with the rest of the cheese and brush with a little olive oil.
  10. Allow to prove for 15 to 20 minutes as the oven comes up to temperature.
  11. Bake for approximately 15 - 20 mins until the cheese on top is golden and bubbling.
  12. Using the parchment "handles" lift the pizza rolls out onto a large platter for serving to your hungry guests.
Unfortunately I haven't got any helpful photographs for this post yet - next time I do this I'll take some and stick them in.  
If you try this recipe please feed back to me how you got on and any variations you make so that I can improve the writing up!